Showing posts with label home made. Show all posts

Wednesday, 21 December 2011

My top secret Christmas cookie recipe

This is the one recipe I make over and over again, and have done from the very first moment I tasted these cookies.

They are also the cookies I make as gifts year in and year out.

My mum found the recipe 'somewhere' and she  is one of those people who names recipes according to the person who gave it too you, or who you make them for or with.

I grew up with thinking a particular dessert was called Vera's Dessert, turns out it wasn't.

So because my mum made these once with my niece for Christmas, they have been forever named, Jessica's Snowballs.  

So here you have it, my all time favourite Christmas cookie.

Single handily responsible for the extra bumps and lumps on my hips and thighs, which is why I only ever eat them at Christmas. 


Jessica's Snowballs 

226 g of butter
 (unsalted or salted- just omit the salt if using salted)
3 tablespoons of caster sugar
1 teaspoon of vanilla essence
1/2 teaspoon of salt (or not if using salted butter)
2 cups of plain flour
3/4 cup of blanched, flaked almonds.
Icing sugar to roll and store the cookies in.

Set oven to about 180 degrees.

Cream the butter with the sugar and vanilla until light and fluffy.
Sift your flour and salt together and blend into the creamed mixture.
Stir in the almonds.

Shape into the size of walnuts or mould into crescent shapes

 I mould mine into crescent shapes, as you can see here.

Place onto an ungreased tray


(sorry about the bad photography my nice camera needs a new memory card, so I am relying on my iPhone)

Bake for about 15 minutes.

While they are still hot, but not straight away (this is a tricky thing to judge), lift them off the tray and very gently roll them in icing sugar, then place them back onto a rack to finish cooling.
I put my icing sugar on a flat plate or try for rolling.


This provides them with a yummy coating, that you won't appreciate until you are eating one.

I then store mine in a tin, smothered in icing sugar.
Only taking them out to gift or eat.


This is before adding the next layer.
Seriously I bury them, so it is like embarking on a snowy expedition to find one.


So there you have it my secret cookie recipe.

I hope you enjoy.

x


Monday, 19 December 2011

Bucket-O-Advent


I love Advent calenders.  

Last year I went in search of something different and I decided on buckets. 
I purchased a pack of 25 from eBay.  

We had a lot the paints from our hand made Christmas in 2008.

They came in plain galvanized silver.  
We left 5 of the buckets silver and the others we painted...

white
gold
green
red

We then stuck gold numbers on them (also purchased from eBay)

And strung them on a piece of tartan ribbon.
We did have to individual tie the buckets onto the ribbon to stop them from slipping towards the middle.


This is how they looked last year.


We have moved house twice since last Christmas.

This is where it hangs now in our hallway (mental note to self, next year -radiator covers) ...


What has been your favourite advent calender?

x


Pin It

Sunday, 18 December 2011

White choc chip and cranberry cookies


We are off to our church community Christmas party this afternoon, and we have all been asked to bring something to share.

We are on a fairly limited (ok none existent) budget at the moment (meaning we are living on the air of God's provision and the little bit left on our credit card).

Normally I would just turn up with nothing, when I feel stretched at every post like I do currently, but I am learning to challenge myself in my generosity. 

This being the case I needed a no fail, no faff recipe that I wasn't going to have to throw out because I had mucked it up.

I have used this Chocolate Chunk Cookie recipe from Joy of Baking, a thousand times (ok I exagerate) but it IS my favourite basic cookie mix recipe.  

I REALLY like this site, especially the tested recipes, as they never fail.  I mean I have NEVER had a failure with any of them, and I can be a fairly creative and hair brained cook.

I won't repost the recipe because that is just redundant.


Here are the things I changed...

*  I used self raising flour so omitted the baking soda (or bi-carb as the rest of the world calls it). 

*  I added 60 gr of dried sweetened cranberries

*  White choc chips INSTEAD of chocolate chunks

*  Mine seemed a little sticky so I added a bit more flour.  
My gauge is when it just about stops sticking to my hands when I roll, so not too much, just a little.

Here is how they turned out.


Scrumdiddlyumptious to the max

Or perhaps I should wait and see what others think later on.


Pin It

Felted Nativity

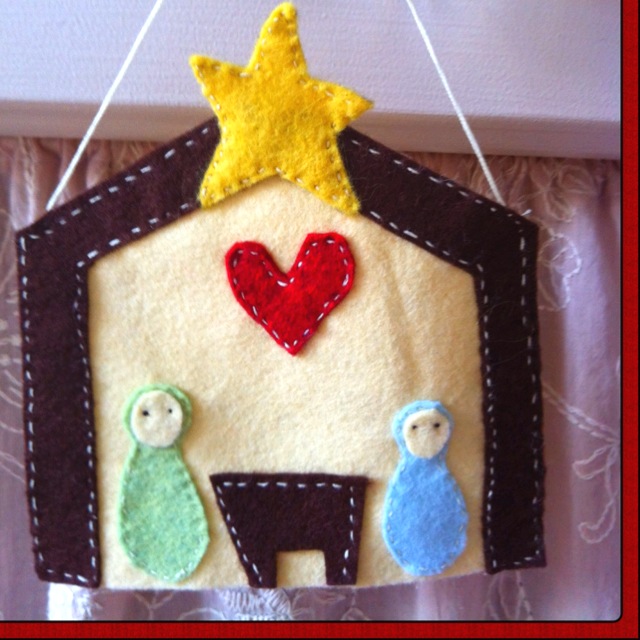
My son Joey (5) loooooves looking through Pinterest with me.  In fact he asked me to make him his own board, so that he or I can pin things that he might like to do, or would like me to do for him (as it turns out).

He was looking through it with me the other day, and we came across a felt nativity at Wild Olive.

I would encourage you to check out Mollies blog, as she was much cleverer than I and took step by step pictures of what she was doing (doh- must get better, and stop getting carried away).


I followed the instructions on Wild Olive blog, where there is also a pattern. To be honest I just cut everything free hand and just stitched it on.

I don't follow patterns well and tend to just do everything ad-hock.

Which is why mine (according to my dear husband), looks like two Telly Tubbies playing pool.

*sigh*


Pin It

Upcycled Christmas Wreaths


Today was the day to make a Christmas wreath.  I had been driving down my road for a couple of days , admiring the wreaths on my neighbours doors, when a friend of mine placed a gorgeous handmade up cycled wreath on her facebook page (actually I suspect it was there already and I missed it).

As soon as I saw it, I knew that was the wreath for me.

In 2008 I had purchased some wreath frames to make holly wreaths, so I was all good to go structurally, I just needed to work out what fabrics to use.

The one I used was similar to this, without the embellishments.


Going through the rag bag I found a size 8 shirt from one of my daughters (the youngest is 13 so that gives you an indication of it's age), and some Christmas looking gingham and ribbons from days gone by.

This is such a simple craft that children could easily do it.

I read on a couple of sites that you could use an old wire coat hanger.  And my friend Michelle who did the original one I admired, had used a piece of repurposed hose from a vacuum cleaner.

All you need to do is cut/tear strips of fabric into desired lengths.  I did different lengths as I don't like things to look polished.

The dark red fabric is the shirt.

There is a red and green gingham.

Some strips of green tartan ribbon.

Some small strips of calico.

With a piece of ribbon tied on to hang it onto my door.

This is the finished effect


And there you have it, a shabby, upcycled Christmas wreath.


But wait there is more....

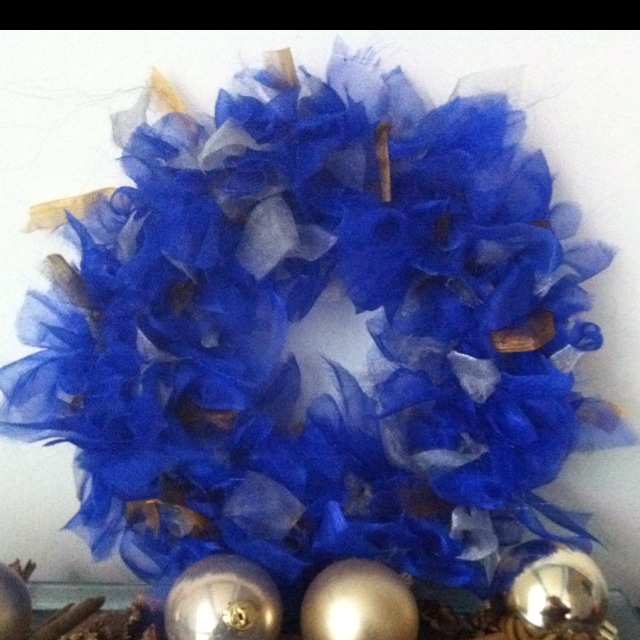
I also found some organza that I had tucked away to make worship flags some years ago.

So I thought I would give a non traditional wreath a go.

It is made exactly the same way, but with strips of organza.

Just to prove that Christmas can be any colour.


There you go, a morning well spent tearing and tying up fabric.  A very therapeutic task indeed, akin to playing with play dough.

Now, where is my vacuum? 
True to form, I seem to have mess everywhere.